
Description
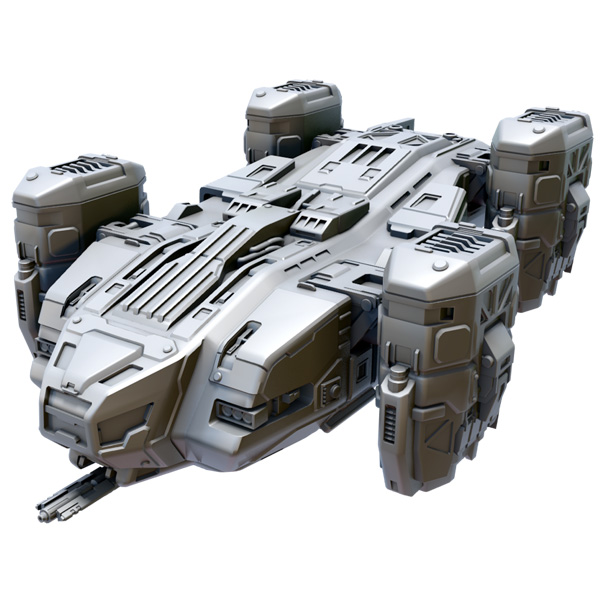
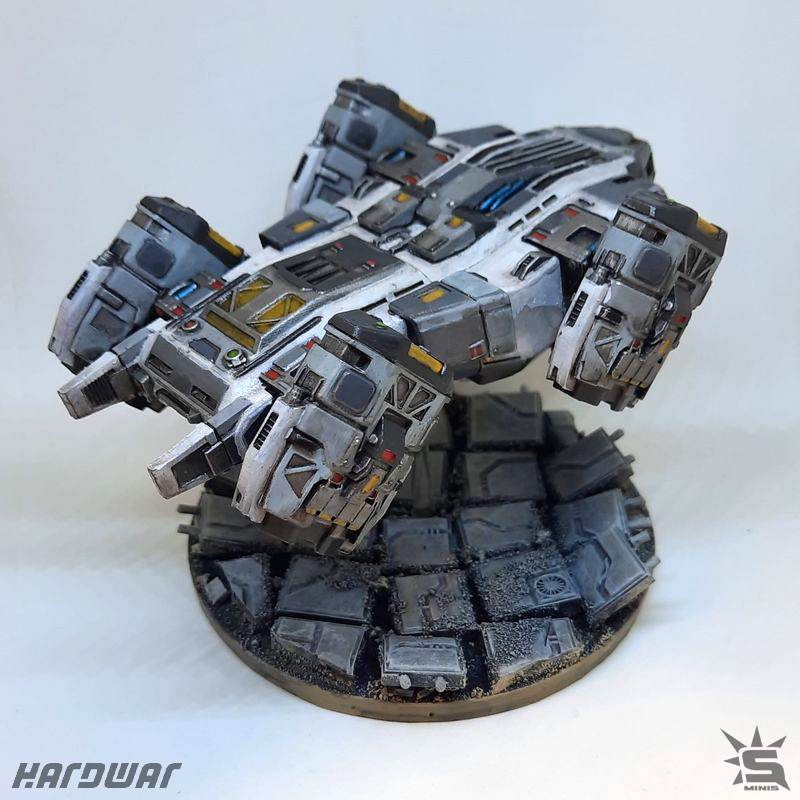
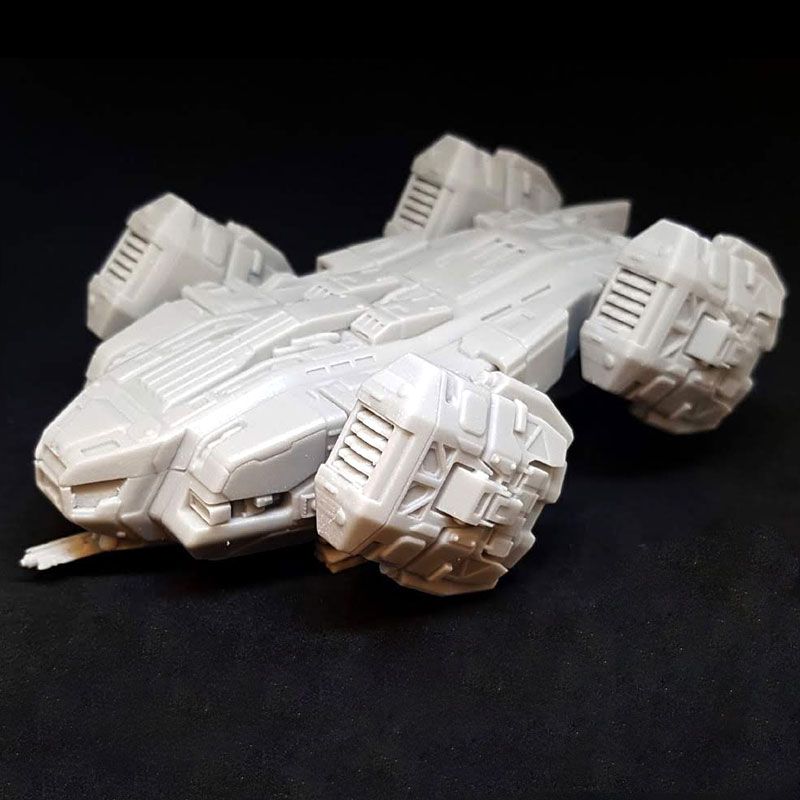
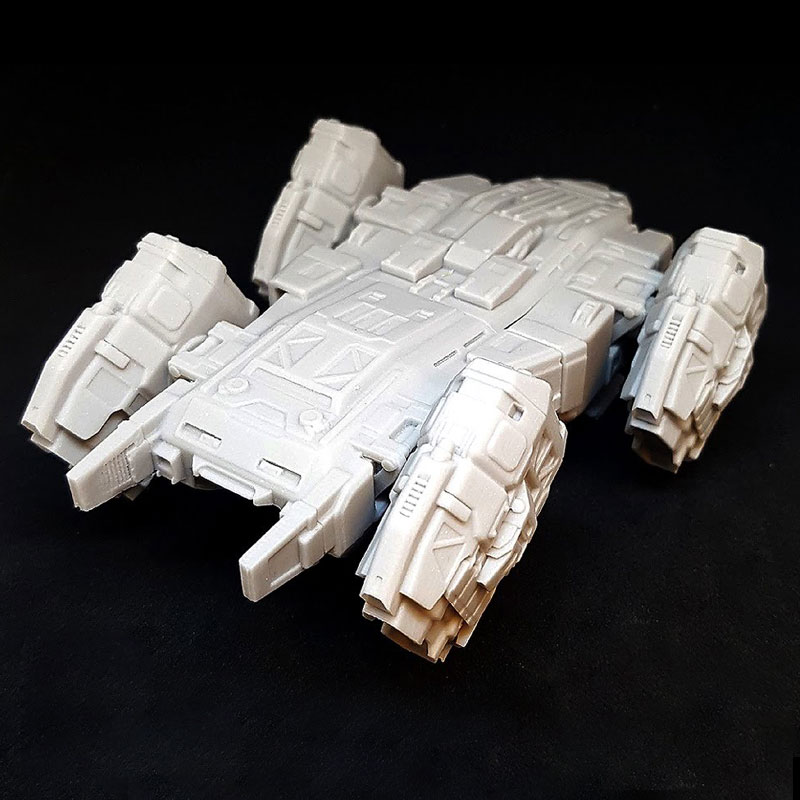
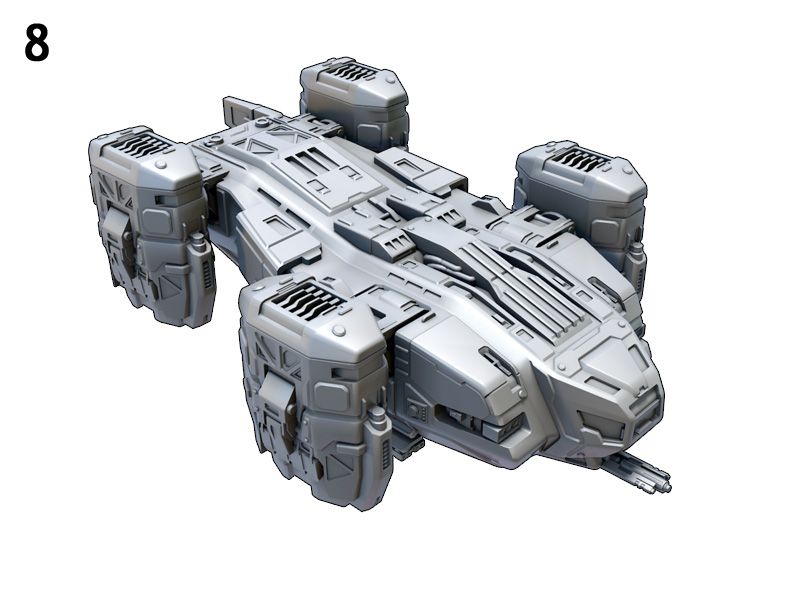
The descent of a Celestial Heavy Transport is monstrous and terrifying to behold, as this trans-atmospheric heavy transport aircraft brings not only its own substantial bulk and firepower but also a payload that often includes mechs, delivered directly to the heart of the battle.
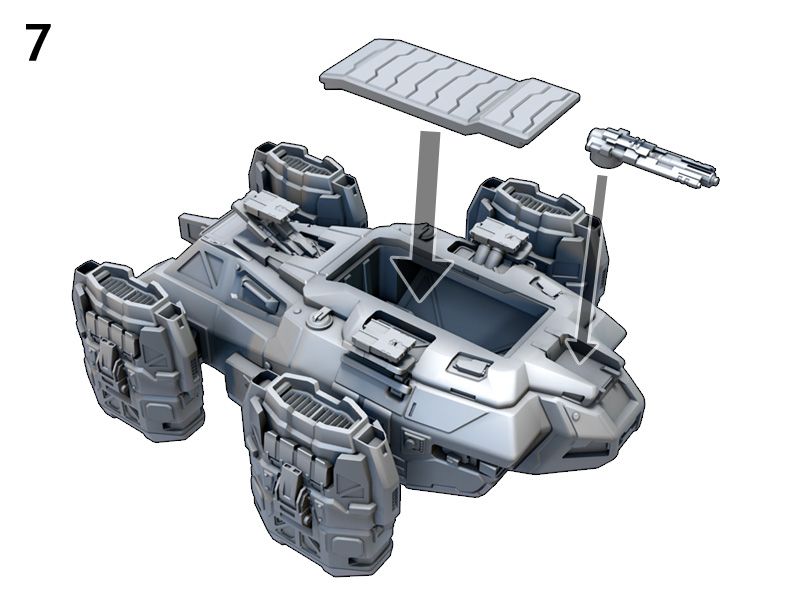
The model has a real, open transport bay in the main hull and additional cargo bay in the tail section. It comes with two versions of landing gear (opened and closed).
The model is based on the original design by Stéphane Chasseloup.
Converted, detailed and optimized for production by Strato Minis Studio.
![]()
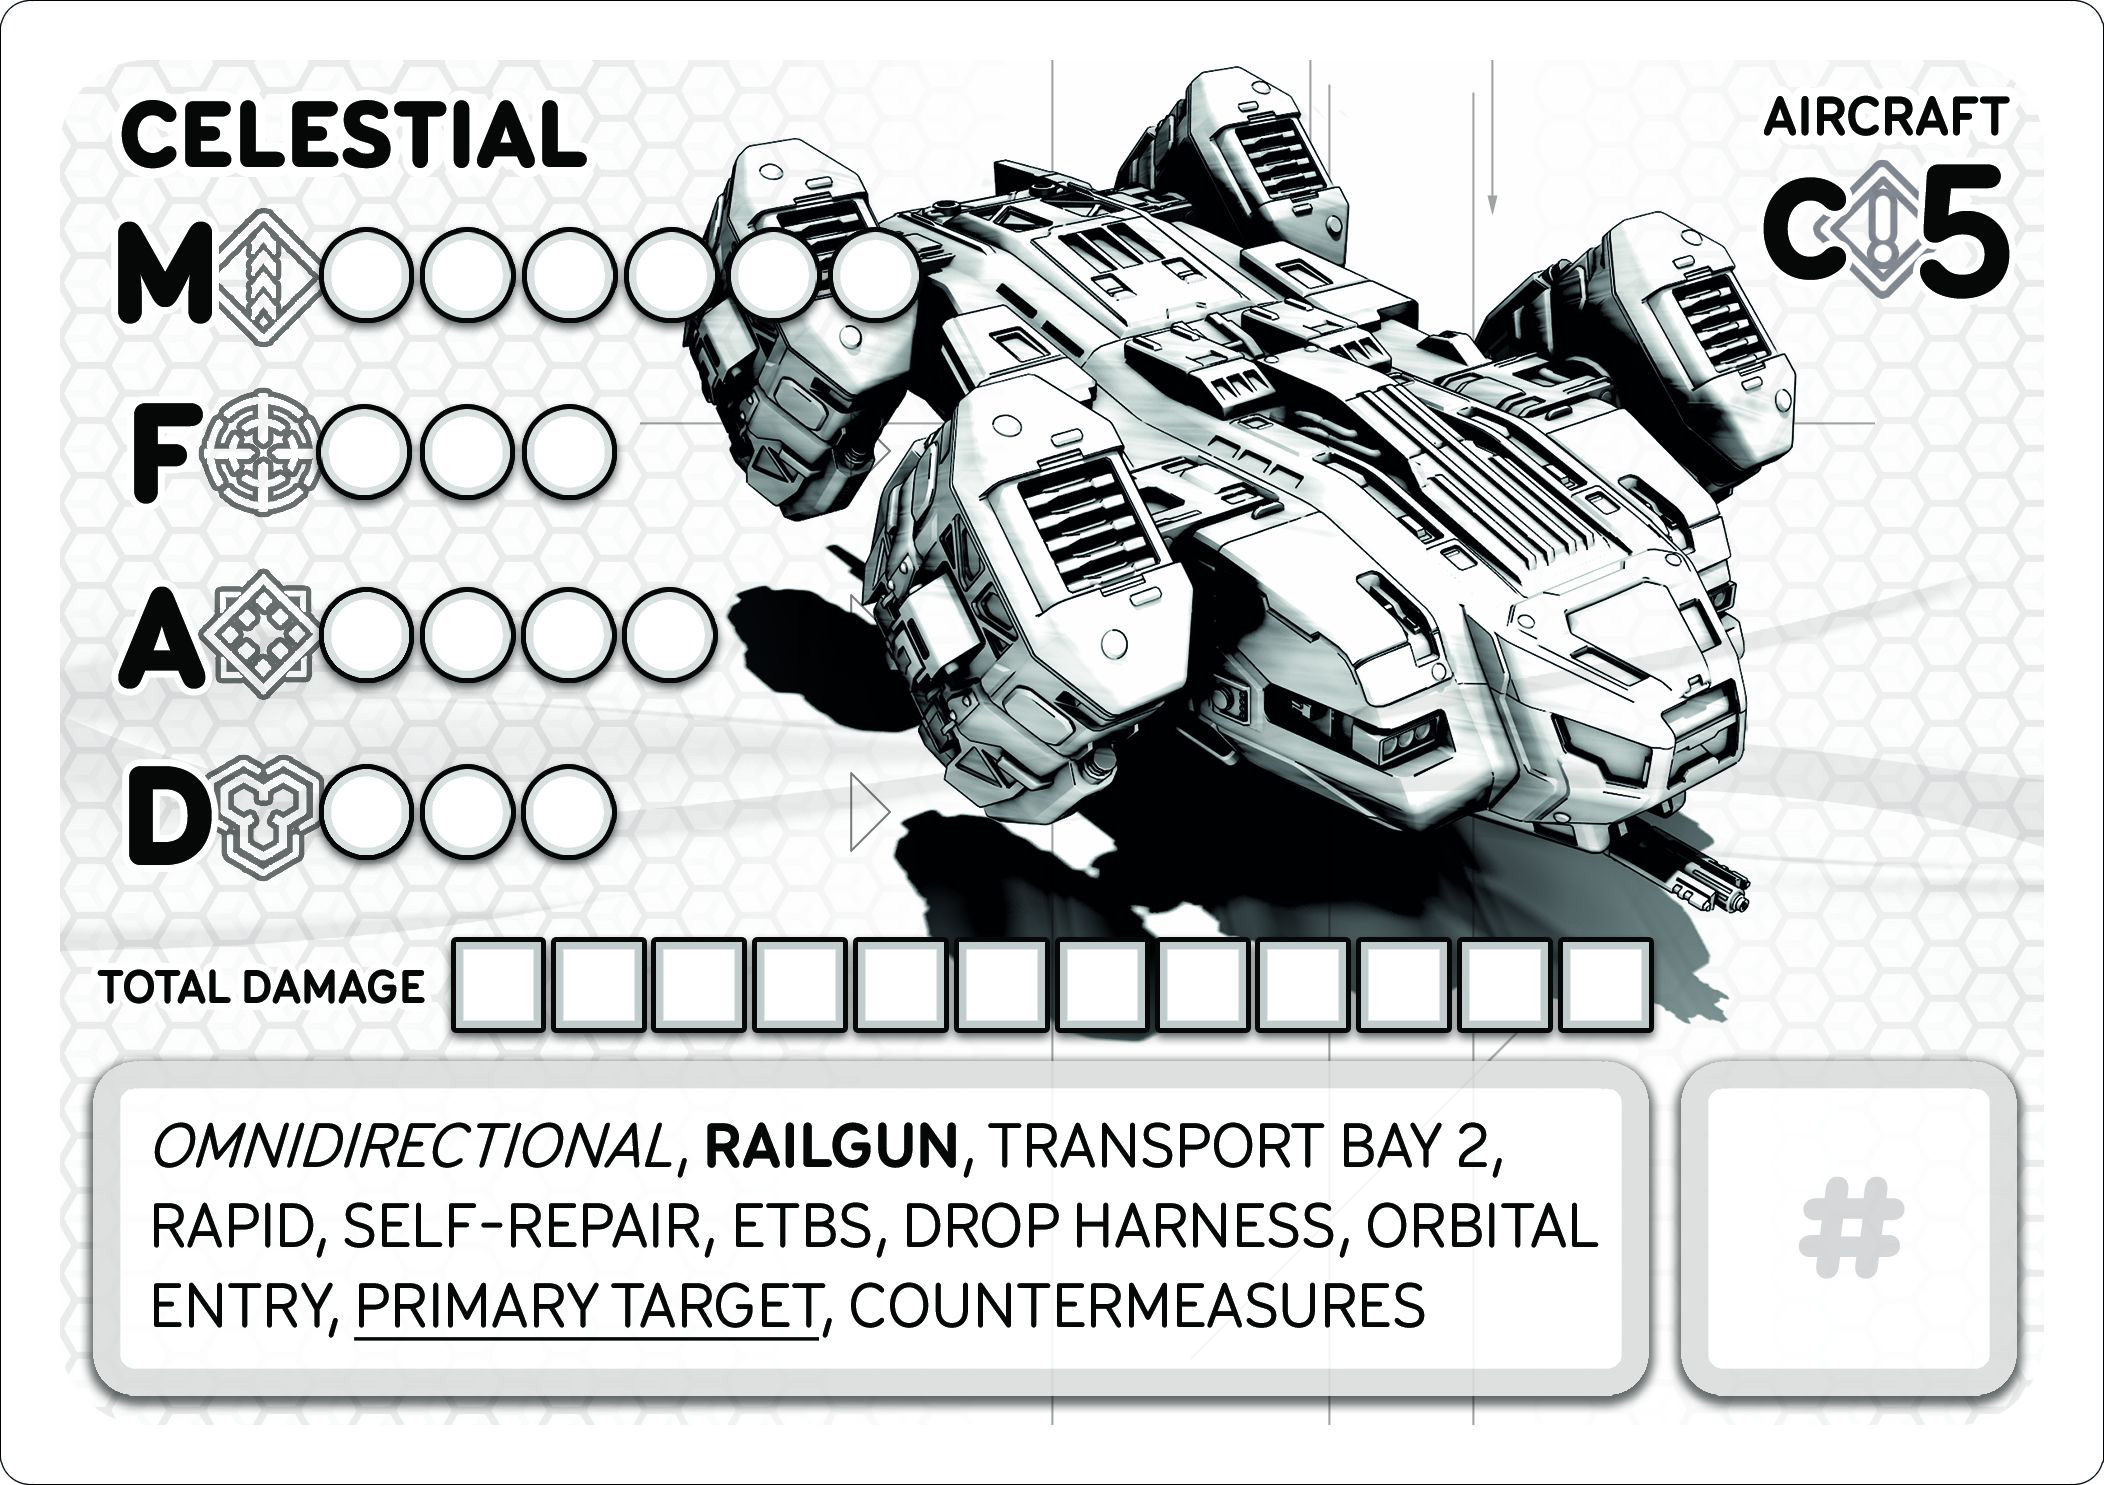
The card image is prepared to be printed on a standard printer.
Image size is 3,5″ x 2,5″ / 89mm x 63mm (600DPI) when printed in 1:1 scale.
Construction Manual


headlesshorseman (verified owner) –
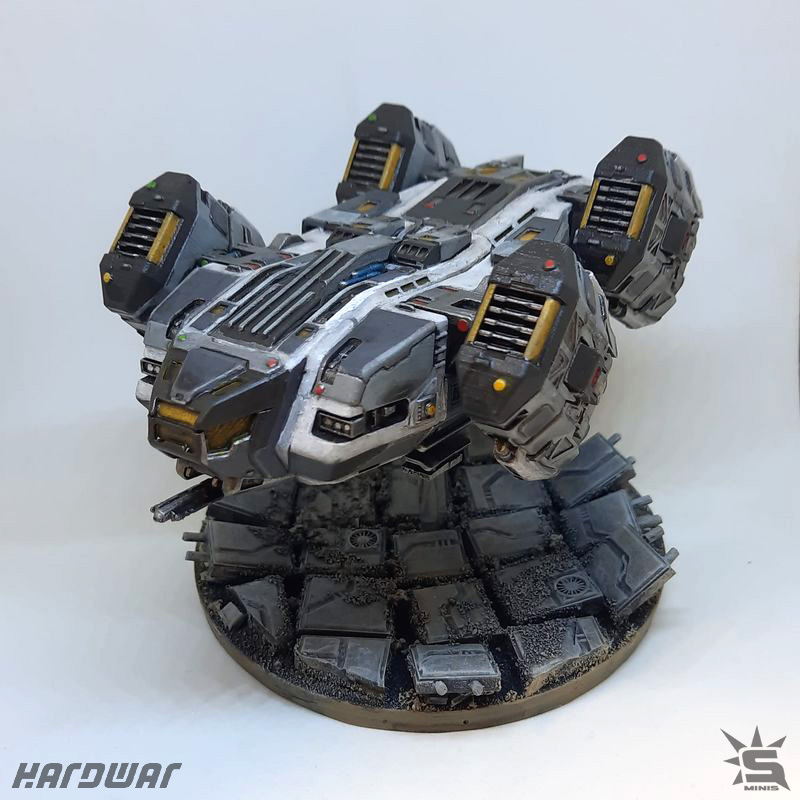
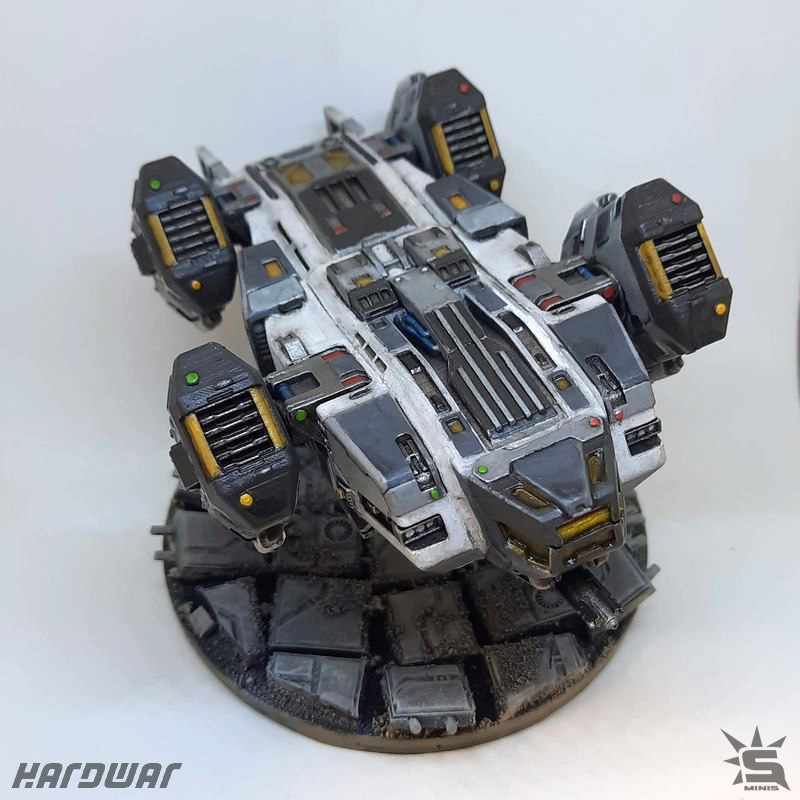
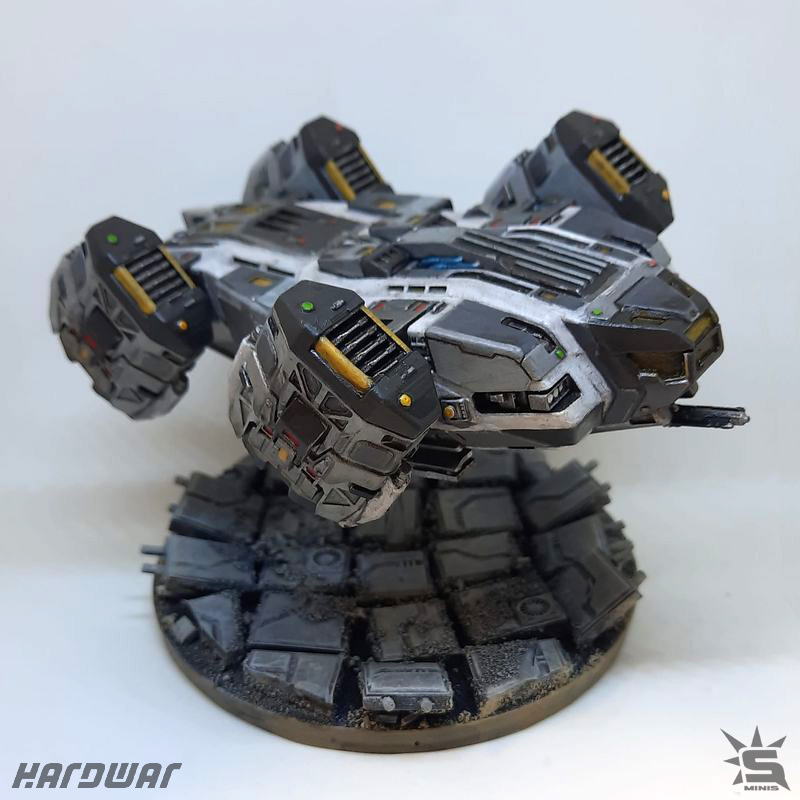
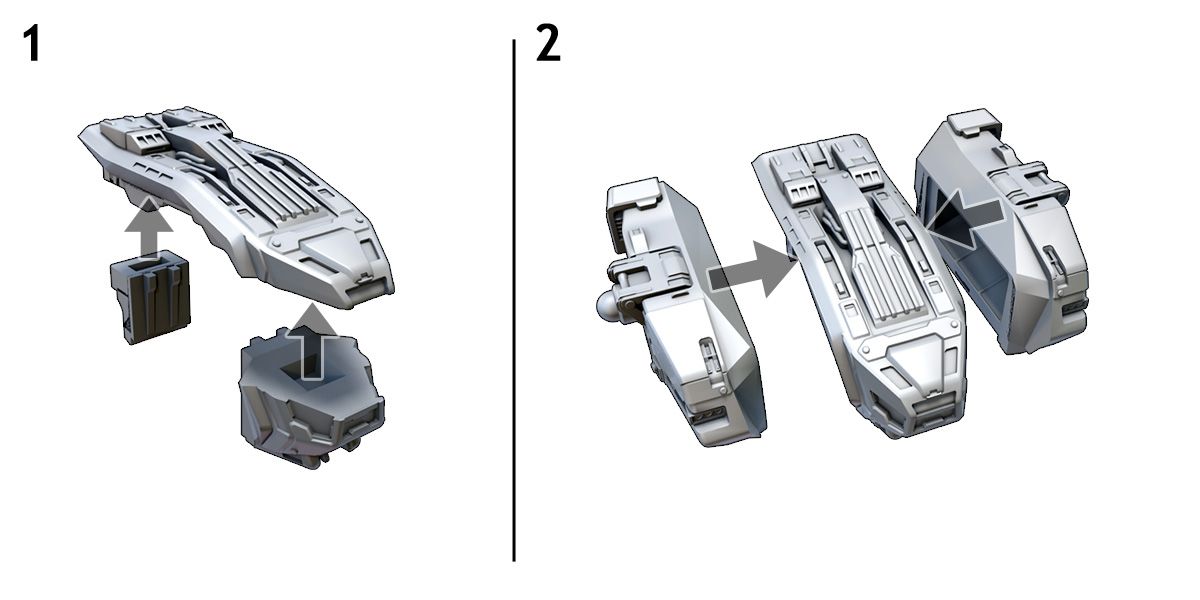
Here’s my version of the Celestial Heavy Transport from Strato Minis. This is the largest miniature I have ever worked on since I started in BattleTech. You might think that with this being such a large unit, that Strato might skimp on the details but you would be very wrong. Just like all the other Strato miniatures that I have reported on, this one is extremely well detailed with lots of parts. Because this unit has so many parts, Strato has posted detailed assembly instructions on their website which is invaluable during construction. Lay out all the parts and identify them to begin the process. You will want to refer to the instructions often as I will during this review.
1. In Step 1, when you join the lower cockpit to the upper fuselage section it leaves a small gap that is easily filled in.
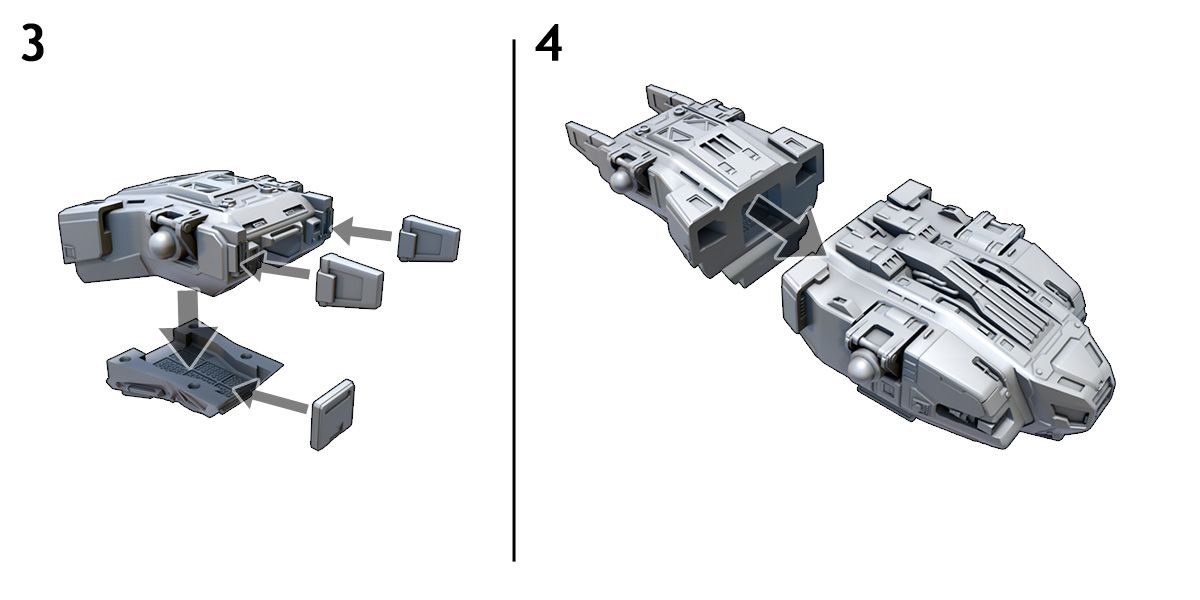
2. In Step 3 they show the rear cargo bay door in the closed position. I chose to assemble it in the horizontal (down)position to emphasize the existence of the bay itself.
3. In Step 4 you mate the rear fuselage section to the forward fuselage section. On my initial test fitting I found that there was a major gap between the two sections. I sanded down the tab construct on the rear of the forward section and this alleviated almost all of the problem. The remaining gap was very small and easy to fill, leaving no trace.
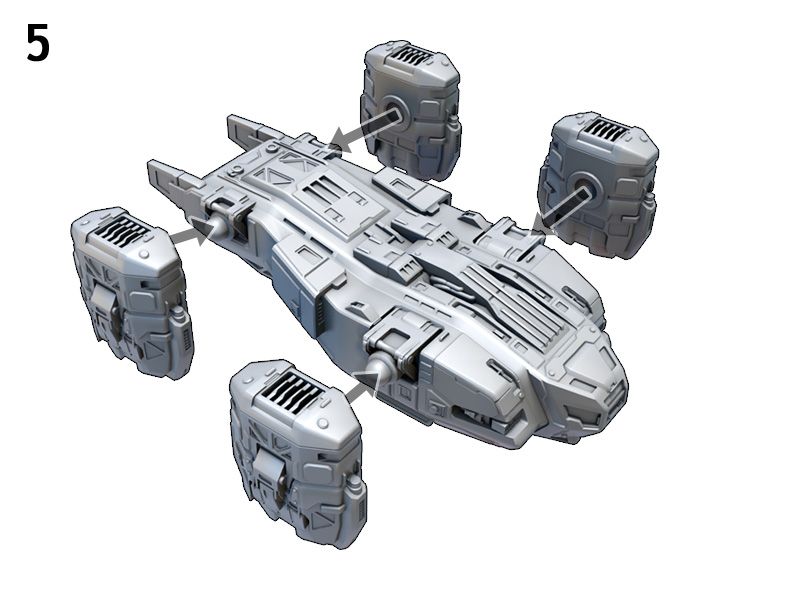
4. In step 5 they show the addition of the four engine pods. These are so large that I left them off and painted them separately, then added them to the fuselage as the last step. If they are in place before you paint the mini it will be very difficult to paint the inside of the pods as well as the fuselage sides. Note: The four engine pods look identical on first glance. However, when you examine the pods closely, you’ll find that the intakes have louvers that are canted down. This does actually create port and starboard engine pairs, so be careful in their orientation.
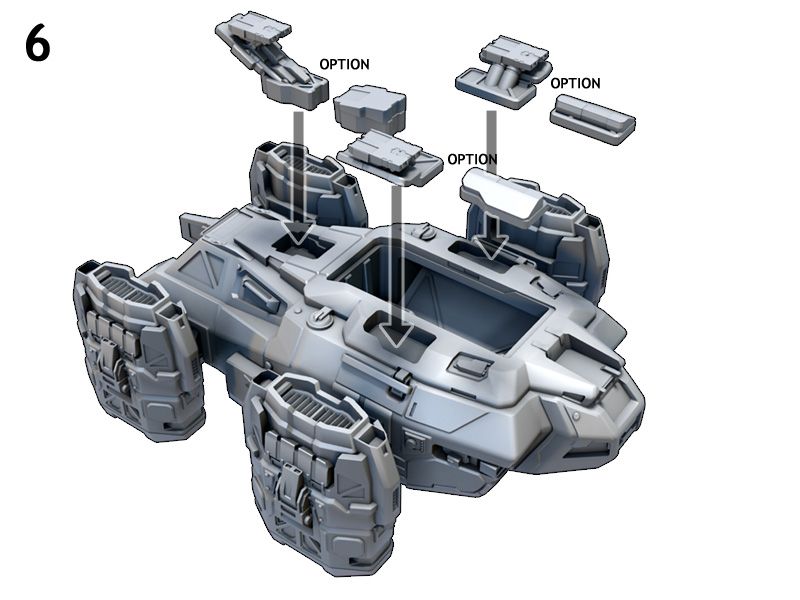
5. Step 6 shows the installation of the main cargo bay ramp. I contacted Strato and asked how the ramp was hinged. They told me that the ramp is designed to be hinged in the front, so this is how I assembled it. The only problem is that there is so little ground clearance that you can’t lower the ramp very much. Mine is down as far as it can go and it’s barely noticeable.
Overall, the miniature is very impressive. It is a great build and it dwarfs even the L13 which is the next largest transport in their collection. It is a bit on the expensive side but is well worth the investment if you want a great unit to show off. I am very glad to be able to add it to my collection.